
Back to Evil Eye
To make an evil eye bracelet with beads, start with your wrist size, a simple bead layout, and stretch cord that fits through every bead hole. Then string the pattern, tie a firm knot, and tuck the knot out of sight.
This is a friendly first jewelry project because the steps are clear and the materials stay manageable. The evil eye bead adds meaning without needing a big speech around it: a small symbol of care, watchfulness, and good wishes.
A few beads, stretch cord, and one patient knot are enough for a DIY evil eye bracelet you can actually wear.
Project snapshot for beginners
Your first evil eye beads bracelet is a stretch-cord project: measure, plan, string, and tie. Most beginners can finish one in 30 to 45 minutes, especially if the bead layout is kept simple.
- Estimated time: plan 30 to 45 minutes for measuring, arranging beads, stringing, and checking the knot.
- Difficulty level: beginner-friendly, with no clasp, wire wrapping, or advanced tools.
- Best bracelet style: stretch cord is the easiest place to start because it forgives small sizing changes.
The evil eye bead sits within broader cultural views of the evil eye: it is often worn as a symbol of care and protection in intention, not as a guaranteed charm. Keep the meaning respectful and personal, and let the making part stay practical.
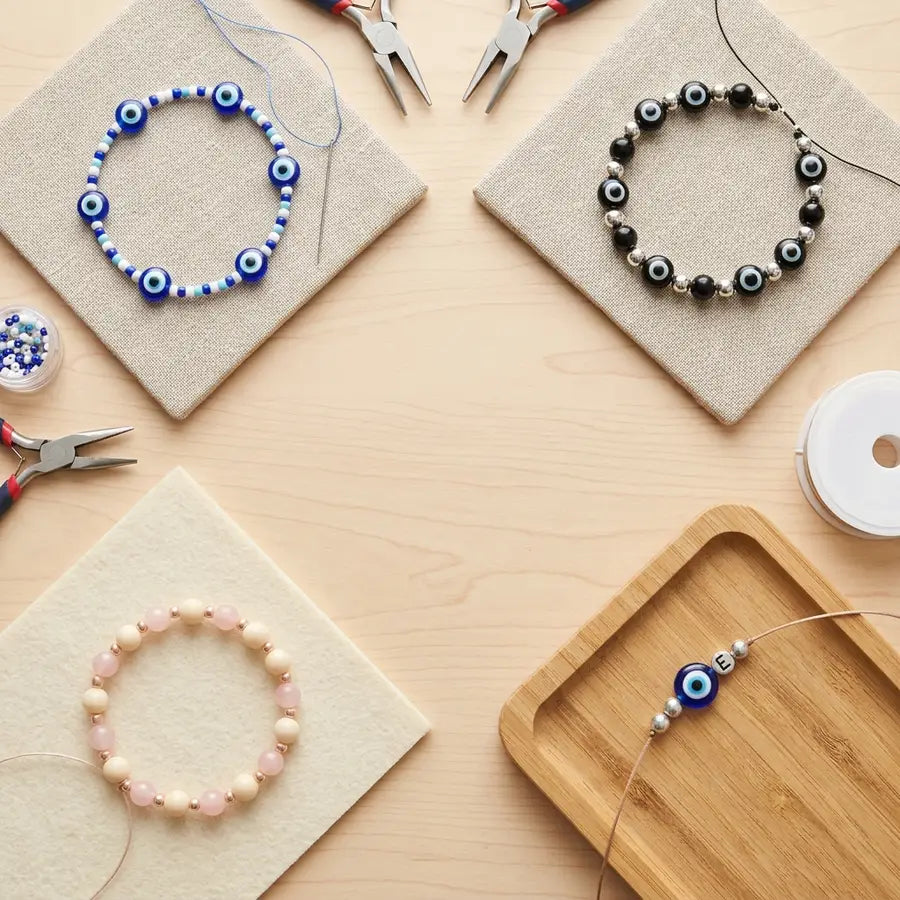
Supplies for an evil eye bead bracelet DIY
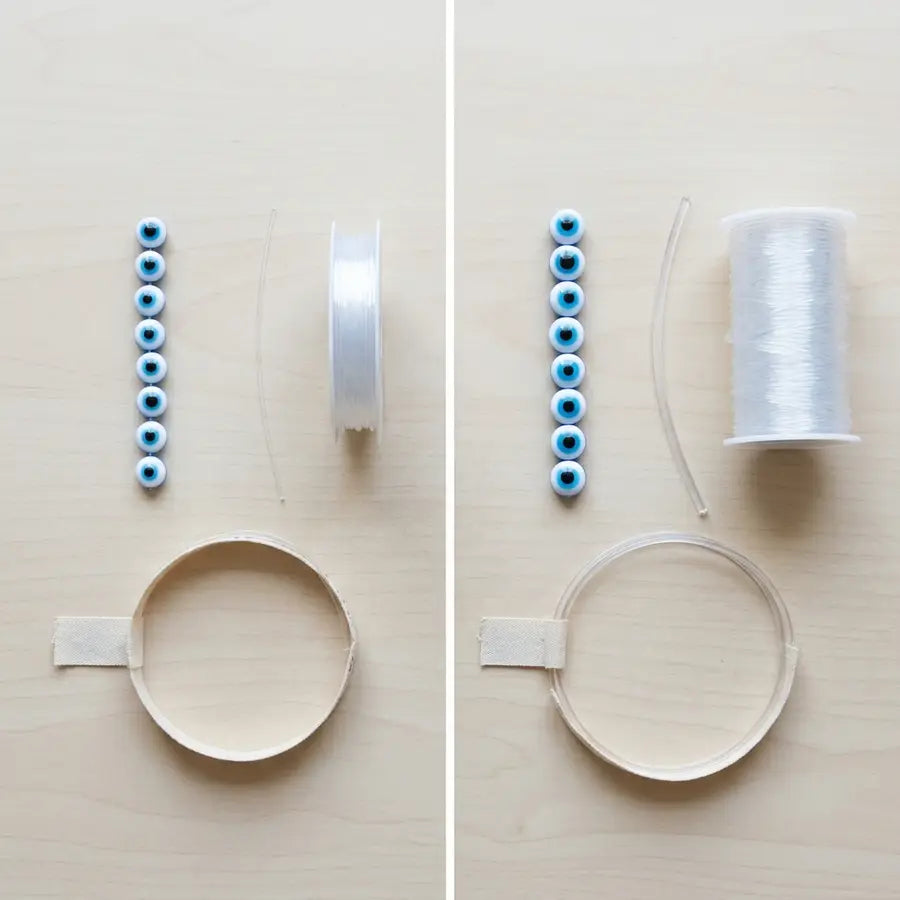
Keep your supply pile small. Evil eye beads, stretch cord, spacers, and a few household-style tools are enough for a clean first bracelet.

- Choose one larger evil eye bead for the center, then add smaller eye beads only if you want the motif to repeat.
- Use clear stretch cord around 0.7 mm to 1 mm; it suits many beginner bead bracelet projects.
- Add spacer or accent beads to control the rhythm, fill tiny gaps, and adjust the fit around the focal bead.
- Keep scissors, a ruler, tape or a bead stopper, and optional jewelry glue close by before you start.
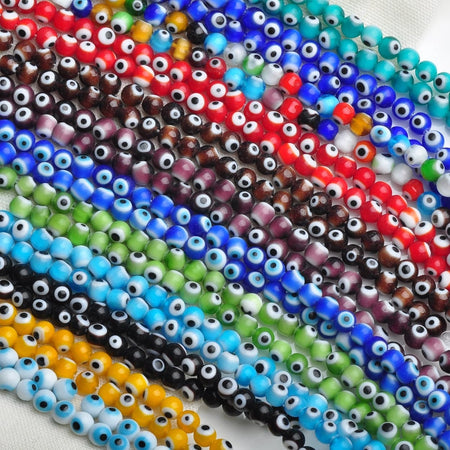
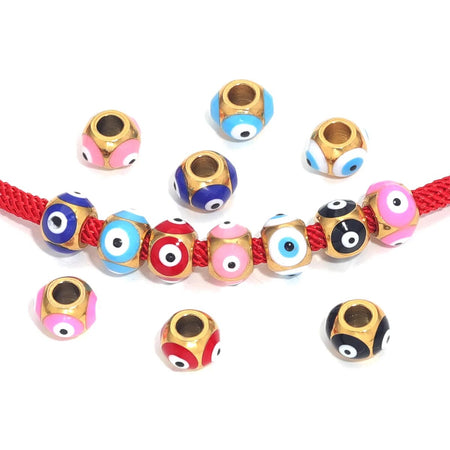
When choosing evil eye beads for jewelry making, check three things before color tempts you too much: bead diameter, hole size, and how the colors sit together. A small variety pack is plenty for a first evil eye beads bracelet.
Elegant Evil Eye Beads in 6mm, 8mm, 10mm Sizes - Perfect for Fashionable Jewelry Making, Bracelets and Necklaces
$10.11 - $10.53
View
50PCS 6mm Round Evil Eye Pattern Millefiori Glass Beads Lot for DIY Jewelry Making Findings
$12.09 - $12.36
View
Premium Gold Plated Stainless Steel Enamel Evil Eye Beads - Ideal for Unique DIY Jewelry Making
$12.05 - $12.43
View
You do not need pliers, crimp beads, or fancy findings for this version. Fewer parts make the first try calmer, and they make mistakes easier to fix.
Choose beads, cord, and bracelet length
Before threading anything, decide the bead size, cord thickness, and finished length. That little pause saves you from a bracelet that looks good on the table but feels tight, bulky, or awkward on the wrist.
What bead size works best?
Six millimeter beads feel light and flexible, while 8 mm beads are easier to handle and make the pattern easier to see. If you use a larger evil eye focal bead, place it at the center and check that it does not flip or press into your wrist.
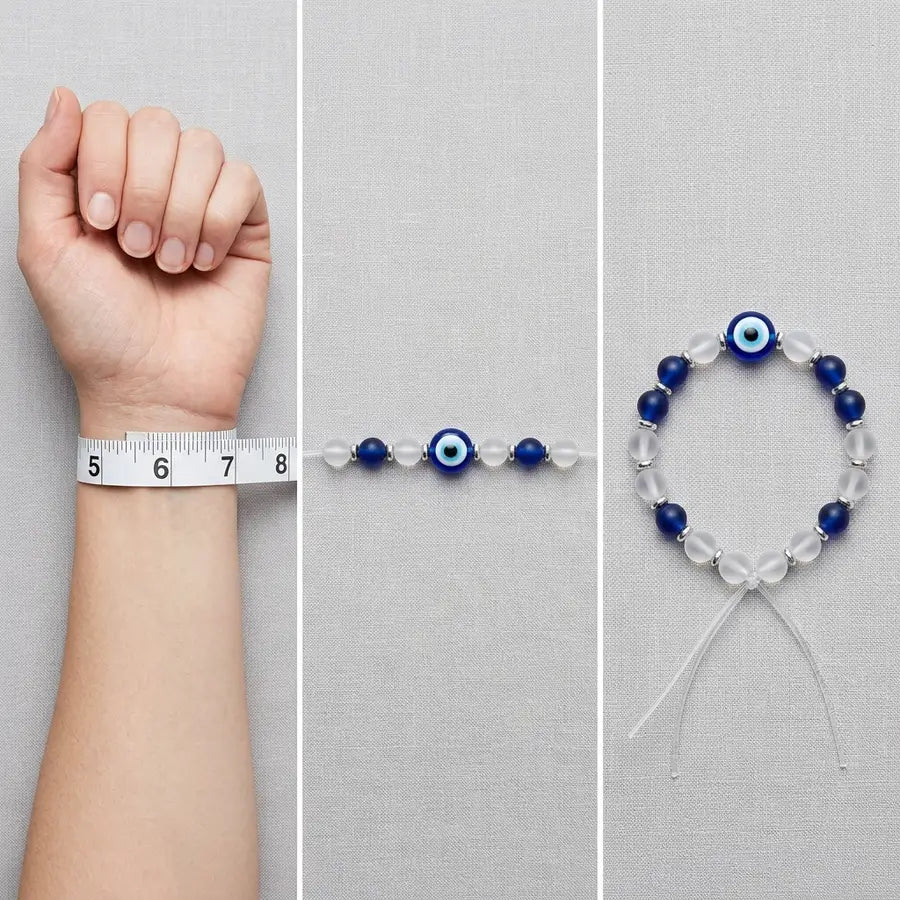
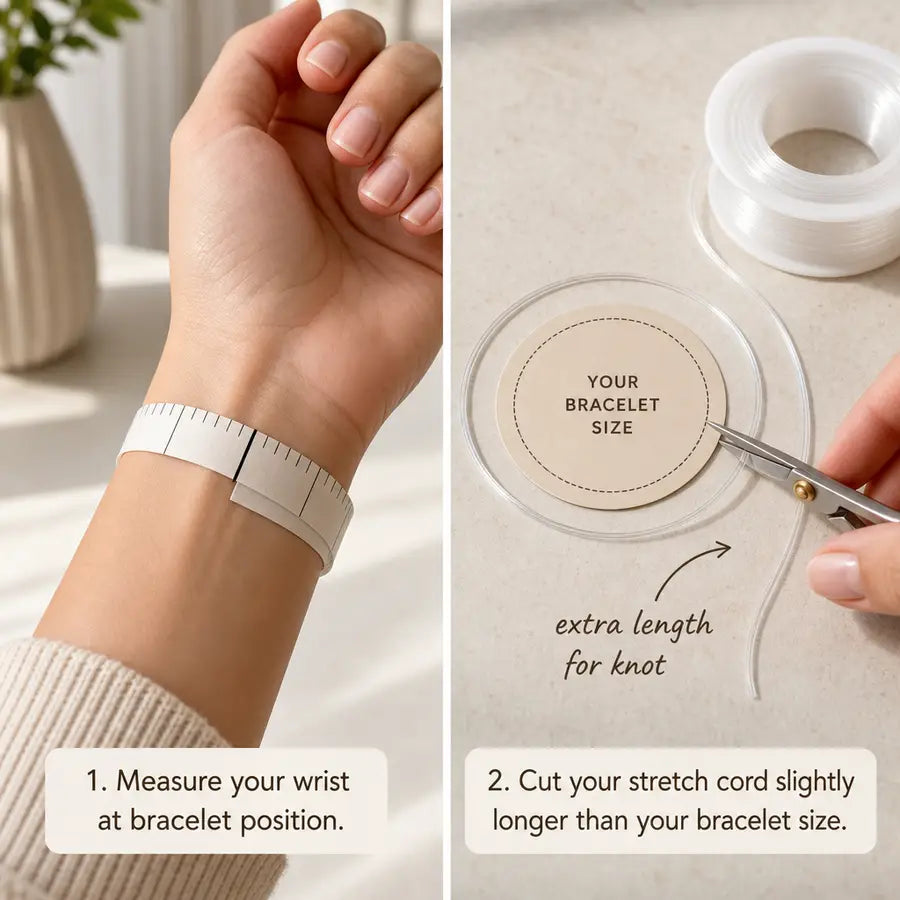
How do you measure bracelet length?
Wrap a tape measure around the wrist where the bracelet will sit, then add about 0.5 to 1 inch for comfort. Cut several extra inches of cord beyond that finished length so your fingers have room to tie.
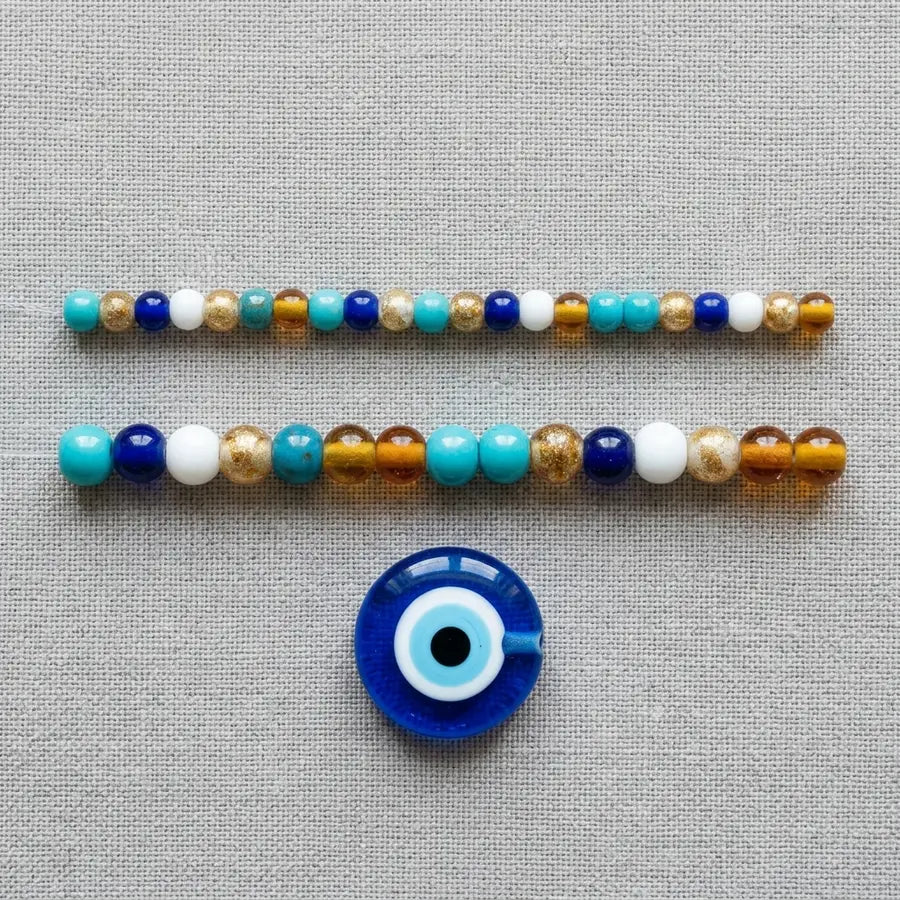
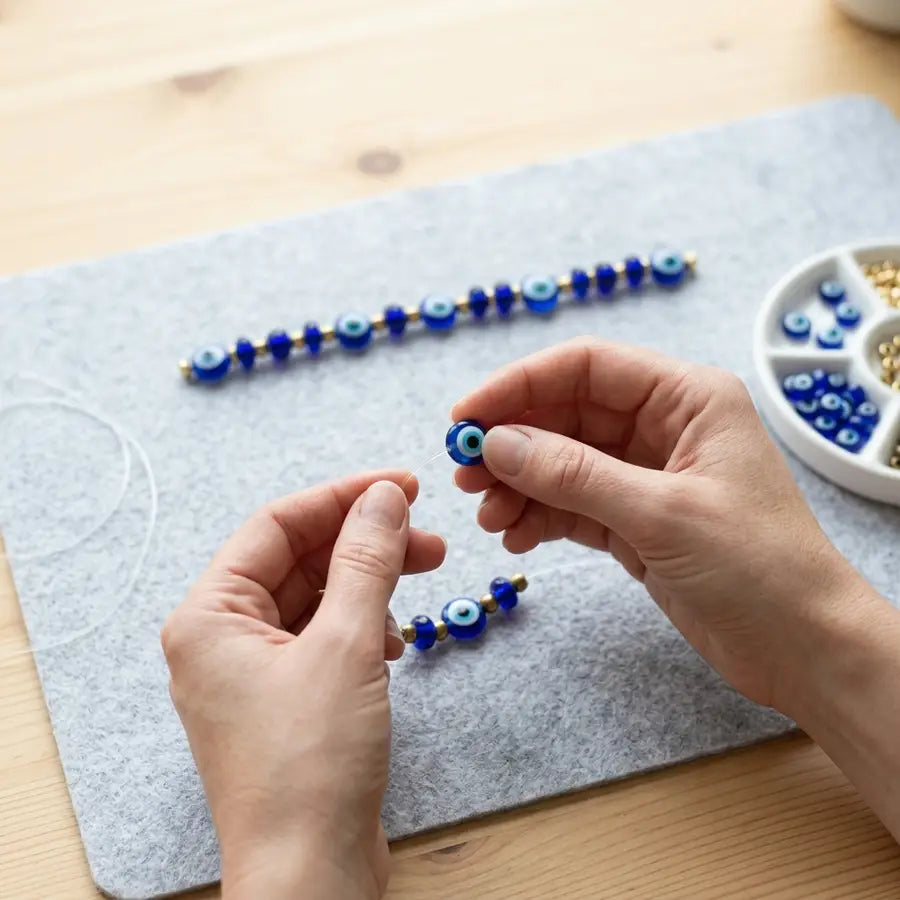
How do you plan the bead pattern?
Lay the beads in a straight line before you thread them. Put the main evil eye bead in the center, then repeat spacer beads, accent beads, or smaller eye beads on each side so the bracelet feels balanced without looking stiff.

10
Products
Evil Eye Beads
Shop evil eye beads for jewelry making, from statement beads to subtle spacer styles for bracelets, necklaces, earrin...
Explore
58
Products
Evil Eye Bracelets
Shop Evil Eye bracelets for everyday style, layered wrist looks, and meaningful gifts. Explore beaded, charm, cuff, b...
ExploreHow to make an evil eye bracelet with beads
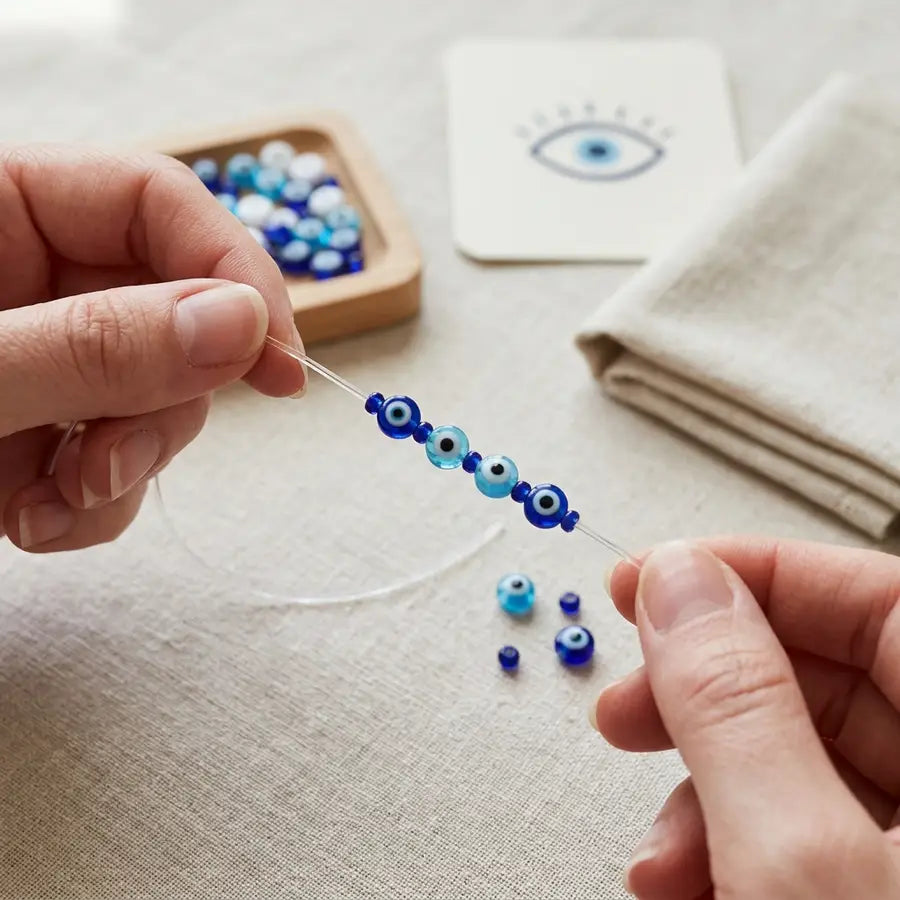
Once the layout is set, how to make an evil eye bracelet with beads comes down to slow stringing and a knot you do not rush. Keep the bead line in front of you while you work so the pattern does not wander.
- Measure your wrist, add comfort room, then cut several extra inches of stretch cord for handling and tying.
- Lay out the beads in order and check the evil eye beads bracelet pattern before the first bead goes on.
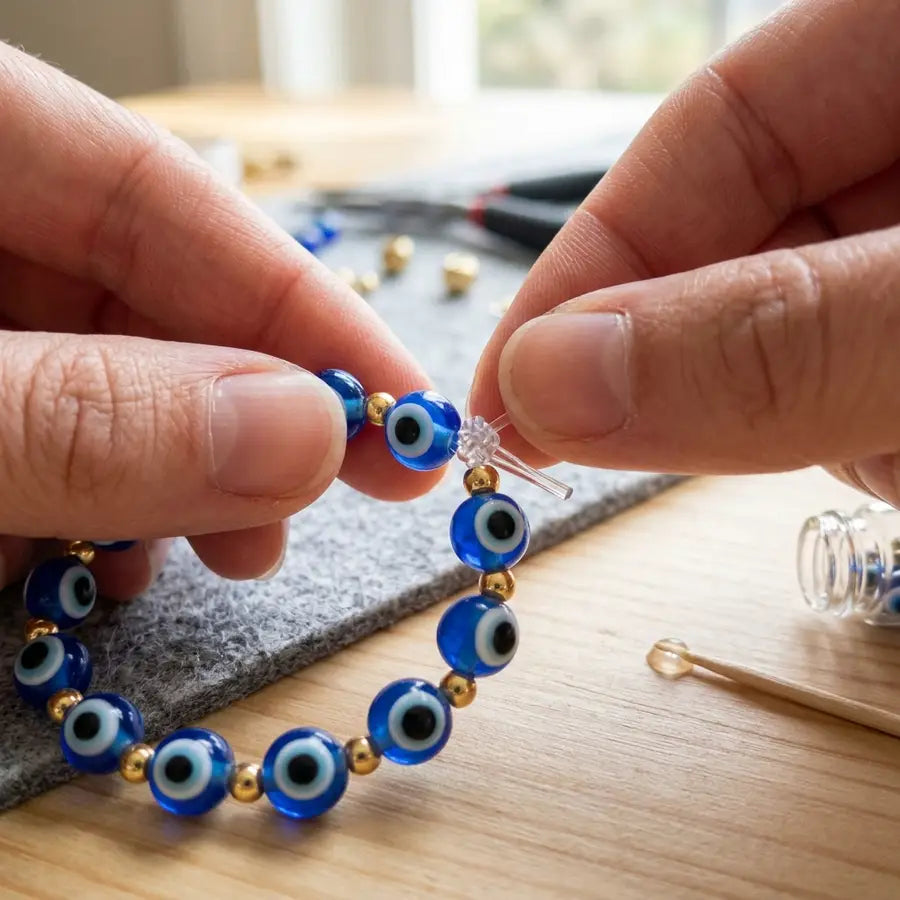
- Tape one cord end or add a bead stopper, then string slowly and compare the bracelet with your layout as it grows.
- Wrap the bracelet around your wrist before tying; it should slide on without sagging or pinching.
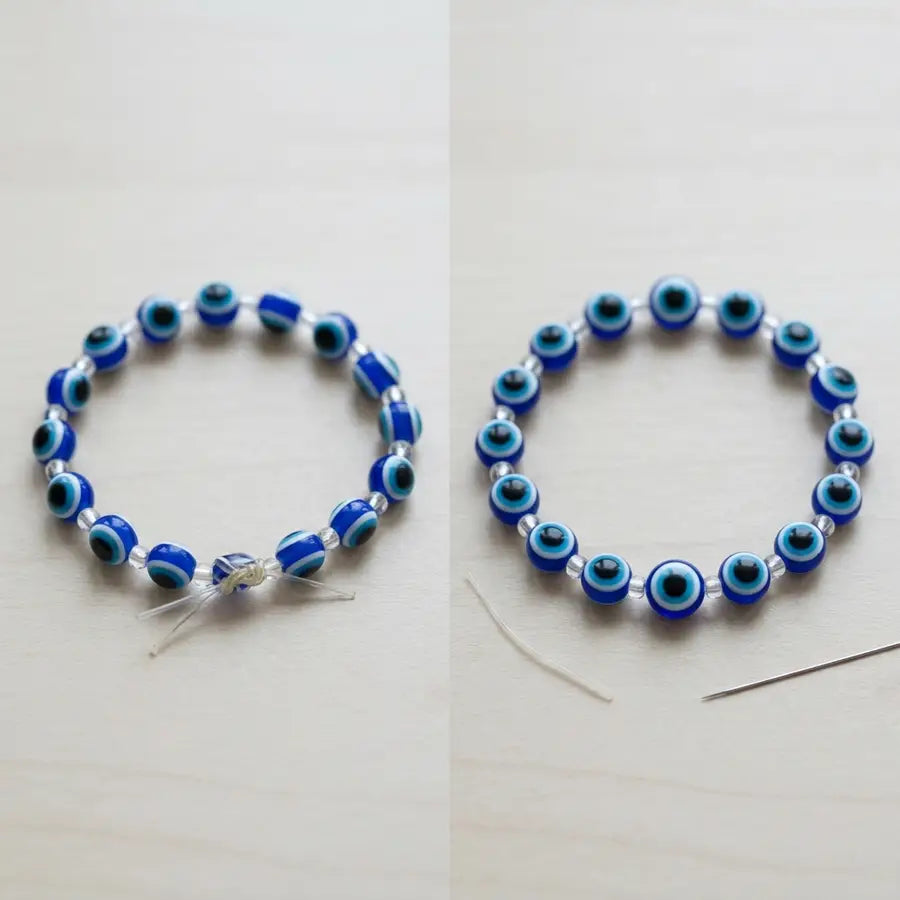
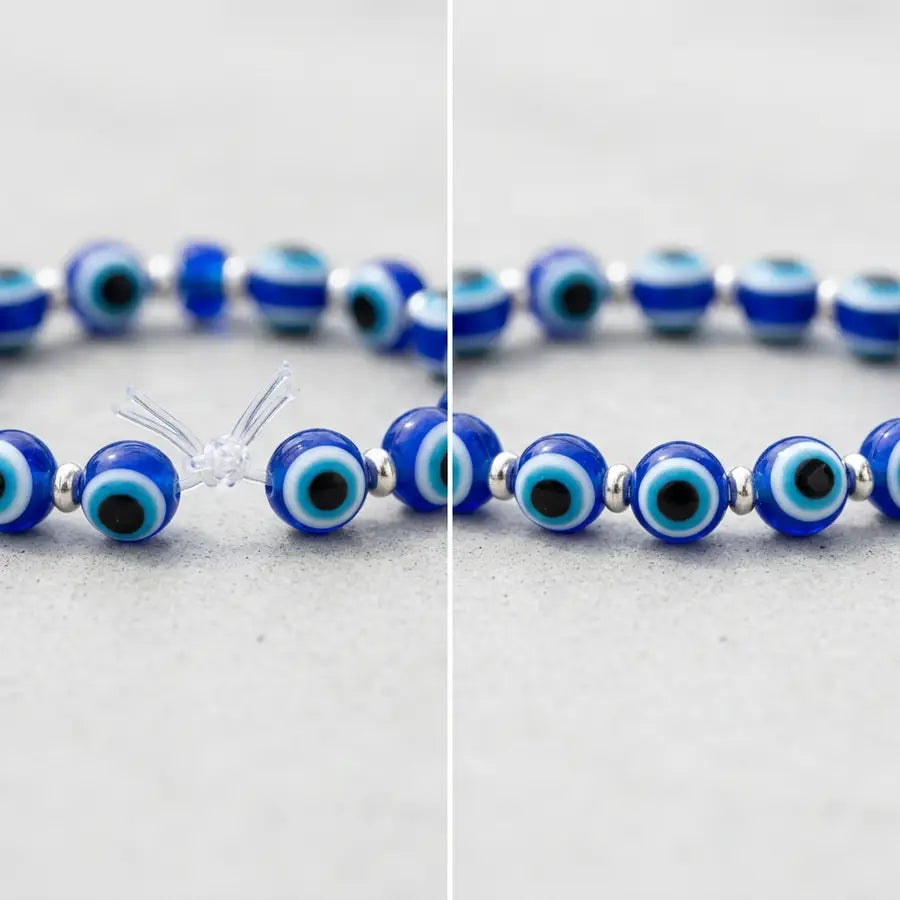
- Tie a surgeon’s knot or a firm double knot, pull both sides evenly, and add a tiny dab of jewelry glue if you like.
- Slide the knot into a nearby bead hole, let any glue dry, then trim the cord ends neatly.
Give the finished bracelet a gentle stretch and look at the spacing. If it pinches, twists, or has a gap that bothers you now, fix it before you start wearing it often.
Beginner mistakes and quick fixes
Small problems are part of evil eye bracelet making. A loose fit, weak knot, or uneven pattern usually needs a quick reset, not a dramatic rescue mission.
- If the cord is too short, tying becomes fiddly; leave several extra inches so your hands can make a clean knot.
- If the colors look uneven, stop and return to the layout; stringing from memory is where patterns often go sideways.
- If the cord looks strained, you may be pulling too hard; test the stretch gently instead of snapping the bracelet wide.
- If the knot rubs your skin, tuck it into a bead hole rather than leaving it exposed.
If your diy evil eye bracelet has large gaps, twisted cord, or a knot that refuses to hide, restring it. Starting over often takes less time than trying to bully a weak finish into behaving.
Design variations and gift ideas
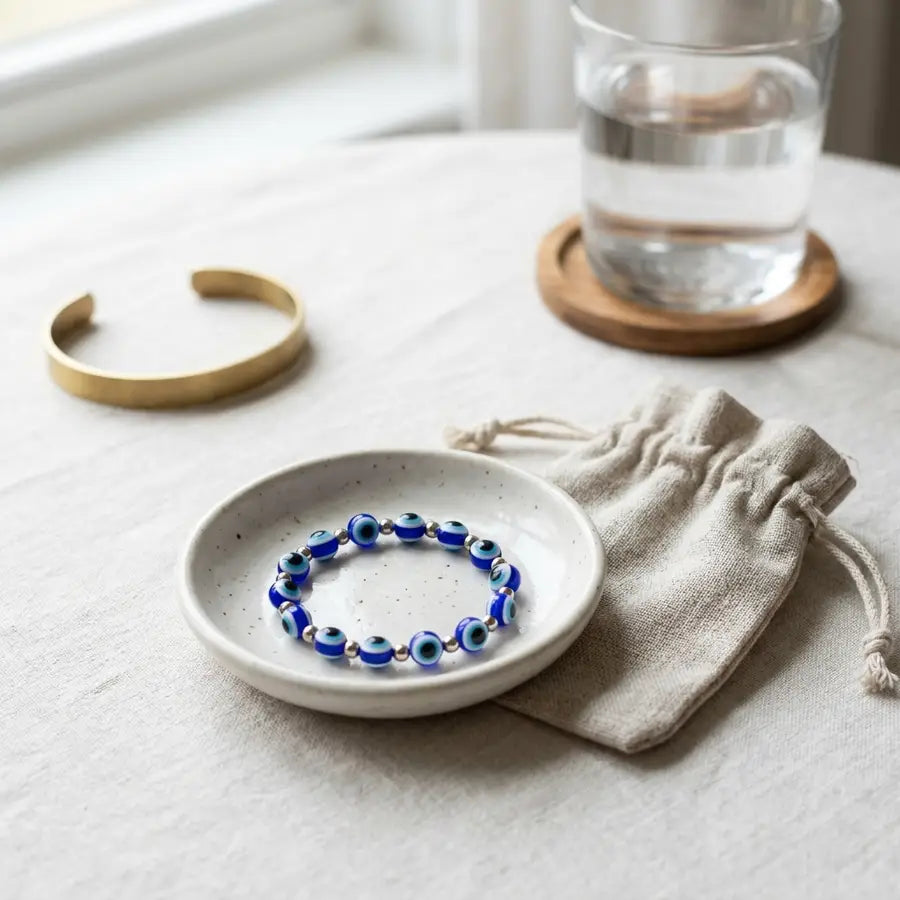
After the basic bracelet makes sense, change one thing at a time: color, bead spacing, initials, or a small charm. For color symbolism as well as style, the meaning behind evil eye colors can help shape the palette: blue and white feels classic, black and silver reads sharper, and soft pink or cream makes the bracelet quieter on the wrist.
- Use one evil eye focal bead in the center, then balance it with plain beads on both sides.
- Repeat smaller evil eye beads around the bracelet if you want a bolder pattern, but leave enough flex for comfort.
- Add letter beads, a name, or one initial to turn an evil eye bead bracelet diy into a personal gift.
- Place tiny spacers or one charm near the focal bead instead of loading the whole bracelet with dangling details.
For gifting, get the wrist size if you can. If you cannot, make the bracelet slightly relaxed and tuck it into a small pouch with a short note about the meaning of the evil eye and simple care.

Exquisite Handmade Bracelet - Evil Eye Charm, Colorful Beads - Unisex Design Perfect for Parties, Gifting, and Special Occasions
$11.36 - $11.39
View

Eye-Catching Adjustable Enamel Evil Eye Friendship Bracelet – Unisex, Vibrant Summer Accessory
$9.85
View

Handcrafted Evil Eye Beaded Bracelet: Timeless Charm for Friendship and Protection
$10.68 - $10.83
View
If time is short or sizing feels uncertain, guidance on choosing an evil eye bracelet for everyday use can give you a similar meaningful look without the bracelet-making steps.
How to care for your evil eye beads bracelet
A few low-effort habits help the bracelet last. Stretch cord does not love rough pulling, moisture, or being crushed under heavier jewelry.
- Keep it dry when possible; remove it before showering, swimming, washing dishes, or applying heavy lotion.
- Roll it gently over your hand instead of yanking one side, which puts extra strain on the cord.
- Store it in a small dish or soft pouch, away from keys, chains, and rough bead edges.
- Check the knot every few wears; if the cord looks frayed or loose, restring it before it breaks.
Short FAQ for first-time bracelet makers
These quick answers cover the questions that usually come up during a first evil eye bead bracelet diy: cord size, tools, bead count, gifting, and meaning.
What size cord should I use?
For most beginner stretch bracelets, use clear elastic cord around 0.7 mm to 1 mm. Test the bead holes before cutting your final cord length.
Can beginners make this without jewelry tools?
Yes. Scissors, a ruler, tape or a bead stopper, and optional jewelry glue are enough for a stretch bracelet. No pliers or crimping tools are needed.
How many evil eye beads should I add?
One focal bead gives a clean center. Smaller evil eye beads can repeat every few spacers, as long as the bracelet still bends comfortably.
Is an evil eye bracelet a good gift?
Yes, especially when you choose the person’s size, colors, or initials with care. Add a short note framing the evil eye as a symbolic wish for care and good things.
Does the bracelet guarantee protection?
No bracelet can guarantee protection. Here, the evil eye symbol is treated as a cultural motif, while the handmade detail gives the piece its personal weight.
Outro
Choose a small group of evil eye beads for jewelry making, measure your wrist, and make one practice bracelet before using your favorite color mix. Once you know how to make an evil eye bracelet with beads, the same steps work for gifts, matching sets, or a quiet little reminder you made by hand.
